Demo list basics in CodeCraft
Since we know how to loop through a list, we can build structures in CodeCraft to demonstrate some list basics such as indexing, slicing, and changing an item's value.
Original List: First, build white columns to represent the original list of numbers:
# Original list, white,35
lst = [1, 2, 3, 4, 5, 6, 7, 8, 9]
for i in range(len(lst)):
    column_m( i, -20, lst[i], 15)   # white column
Demo 1: Access items at index numbers 2 and 4, and highlight them in blue and yellow
column_m(2, -20, lst[2], 45)     # blue
column_m(4, -20, lst[4], 59)     # yellow
Demo 2: Change item's value through its index
lst[7] = 5
column_m(7, -20, lst[7], 55)    # purple
The item at index 7 was assigned a new value, so the new column (purple, height:5) is shorter than the original column (white, height:8)

Keep the original list, comment out demo 1 and 2, refresh the screen, then try the following operations:
Demo 3: Slicing the list
The following code paints column #3 to #8 in a different color.
# slicing the list
s1 = lst[3:8]

for i in range(len(s1)):
    column_m(i+3, -20, s1[i], 18)
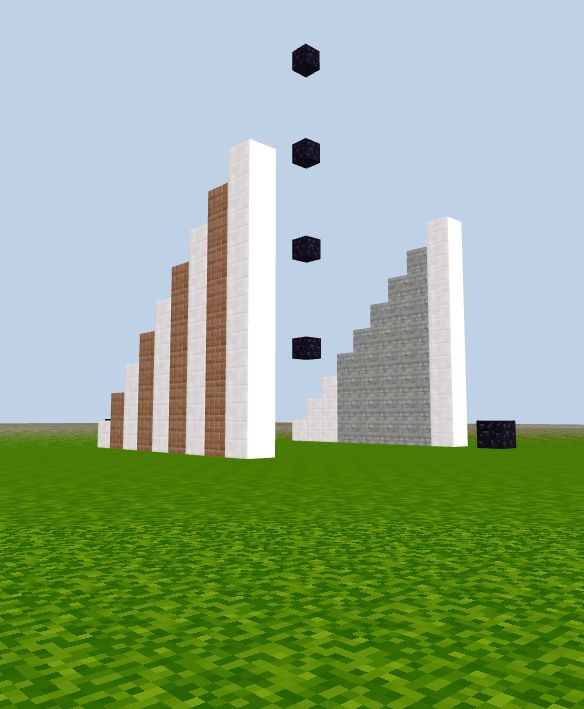
In another demonstration, shift the original list forward with the z value as -10. Now, create a slice s2 of the original list and display it as brick columns, as in the example below.
lst = [1, 2, 3, 4, 5, 6, 7, 8, 9]
for i in range(len(lst)):
    column_m(i, -10, lst[i], 15)

# brick columns represent s2, [2,4,6,8]
s2 = lst[1:8:2]
for i in range(len(s2)):
    column_m((2*i+1), -10, s2[i], 17)
The brick columns are s2; the cobblestone columns are s1.

Note: To make sure each column representing the slice has the same horizontal coordinate as the original list, pay attention to the
xvalue in the functioncolumn_m(). For the slicelst[a:b:step], each item has x value as(step*index + a)